Overview
With TaxLab’s Inland Revenue (IR) integration, you can e-file returns directly with IR and receive IR correspondence in your workspace. If you’re a tax agent, the integration can also retrieve tax payment transactions and automatically import your full client list, creating entities for each client in the software. You’ll need to enable this separately for each client list you want to connect.
This article walks you through enabling your myIR credentials and setting up the IR integration.
A myIR credential versus an Inland Revenue integration
A myIR credential connects a TaxLab organisation to Inland Revenue (IR). A single myIR credential can be used to connect multiple Inland Revenue client lists or IRD numbers, as long as the user who created the credential has the appropriate access to them in myIR.
An IR integration represents either:
- a client list in myIR (for tax agents) or
- an IRD number (for non-agents)
Once a myIR credential has been created, it can be added to one or more IR integrations. Adding a myIR credential to an IR integration allows TaxLab to send information to IR and receive IR data for the entities covered by that integration.
Create a myIR credential
To successfully create a myIR credential you must have the following access in myIR:
- Tax agency integrations: You must have 'Owner' or 'Administrator' (unrestricted) access to the client list in myIR. You can read more about IR access for tax agents here.
- Customer integrations: You must have 'Full account access' to an entity in myIR.
We recommend checking your access rights in myIR before completing the steps below.
- From the TaxLab home screen, in the navigation bar select Administration > Under System > select Integrations.
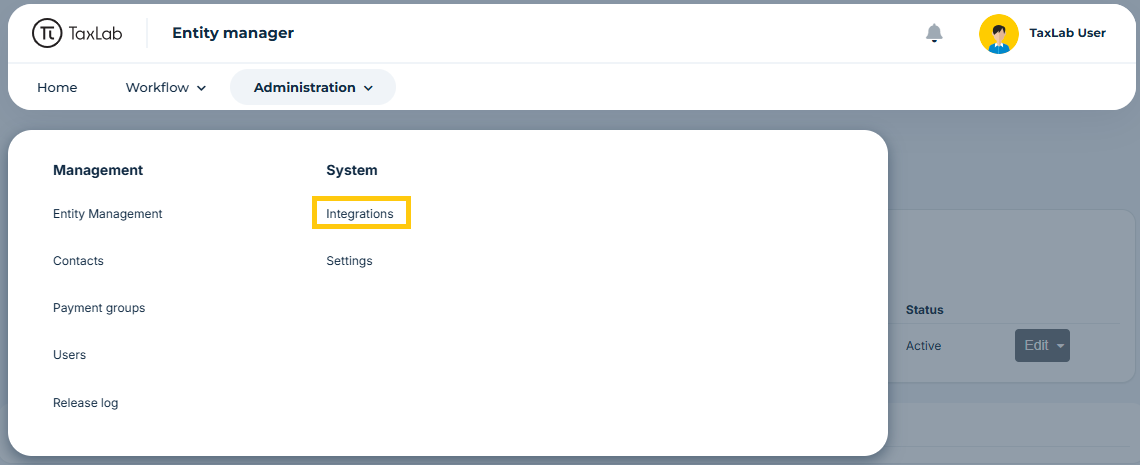
- In Integrations, select New > myIR credential.

- Assign a display name to your myIR credential. This should be easily identifiable to you.
- Select Save.

- Next, you'll be redirected to the Inland Revenue website, where you'll be prompted to provide your myIR Username and Password.
- For tax agents, enter your myIR login details for the tax agency client lists you wish to connect.
- For non-agents, enter your myIR login details that you use to access the IRD numbers in myIR.
- Select Log in.
- IR will prompt you to review their conditions of use and authorise TaxLab access to IR.
- Once you’ve authorised the access, you will be redirected back to TaxLab.
Add an Inland Revenue integration
Once a myIR credential has been added to your organisation, the next step is to set up an IR integration. An IR integration is what your entities are added to, so Taxlab can send information from IR, and receive data back. For tax agents you need one IR integration per client list. For non-agents you need one IR integration for each IRD number.
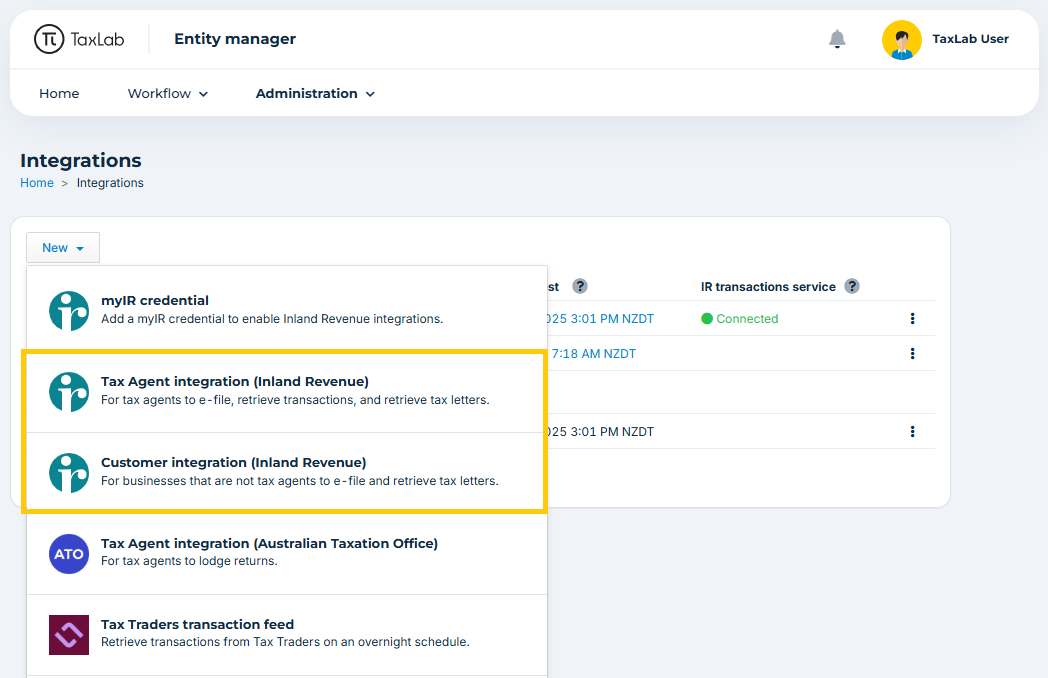
- From the TaxLab Integrations screen, select New:
- If you're a Tax agent select Tax Agent integration (Inland Revenue)
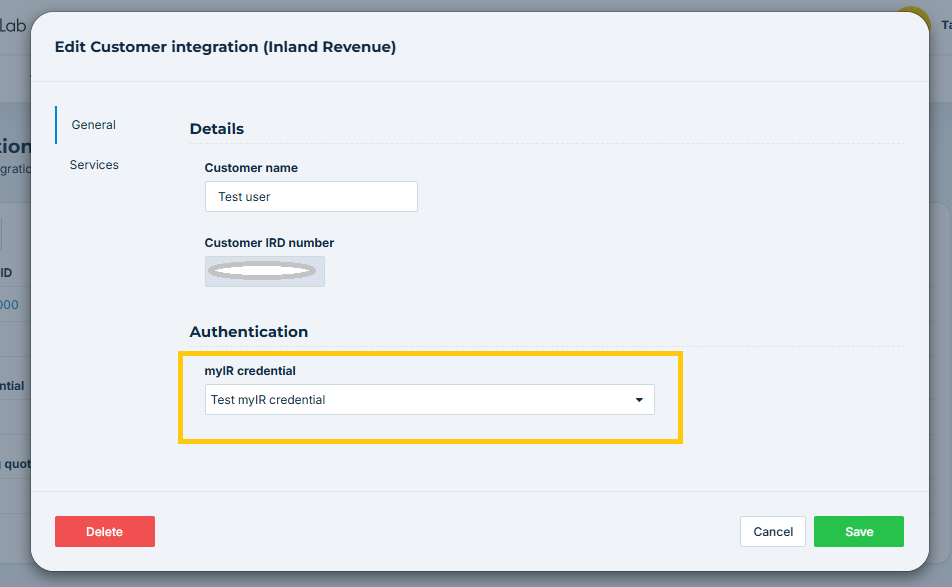
- If you're a Business select Customer integration (Inland Revenue)
- Assign a display name to the integration. This should be easily identifiable, with reference to the client list name or IRD number.
- Enter an IRD number:
- For Tax agency integrations, enter your Tax agency IRD number and the Client list ID number.

- For Customer integrations, enter the IRD number for the entity.

- For Tax agency integrations, enter your Tax agency IRD number and the Client list ID number.
- Under Authentication > myIR credential, select the dropdown arrow and choose the myIR credential needed for the integration.
- Select Save.
Services
The services tab of the Inland Revenue integration allows you to enable different features available through the integration.
To access these, select Services on the left hand side of the Inland Revenue integration setup. 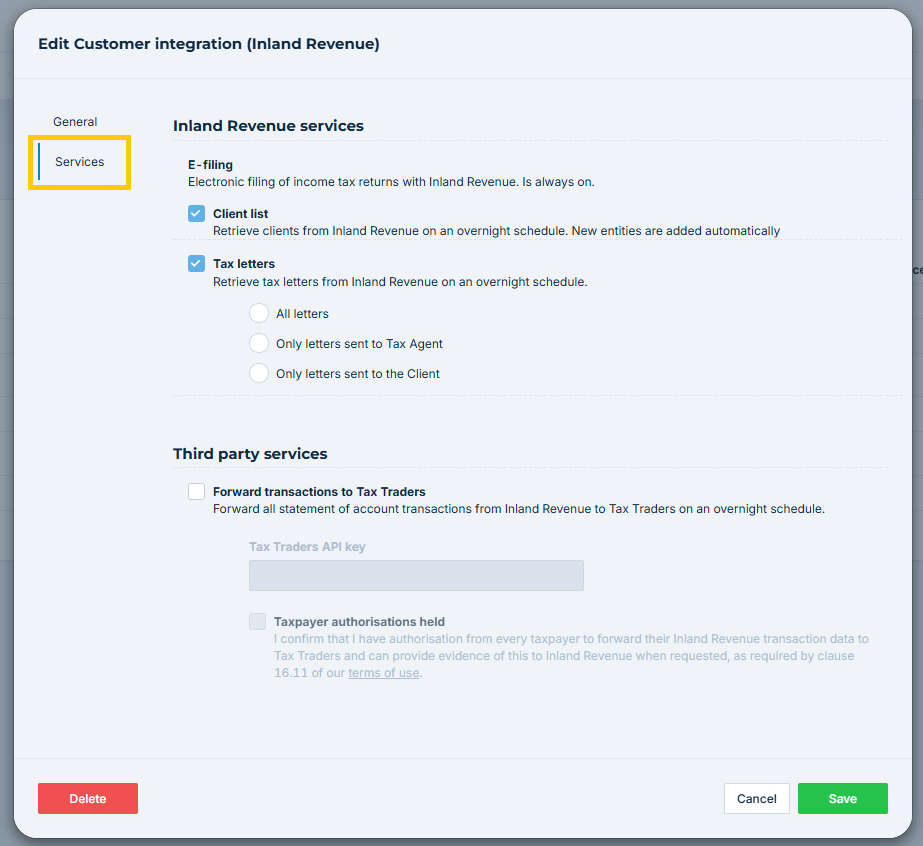
- Select the check box next to Client list to retrieve your clients from Inland Revenue (only visible to tax agents).
- Select the check box next to Tax letters to retrieve tax letters from Inland Revenue.
Changing a myIR credential
If you need to update a myIR credential, such as when the person who originally set it up is no longer with the organisation, follow these steps:
- Create a new myIR credential as detailed above.
- Update the integration: select the more options menu to the right of the integration.
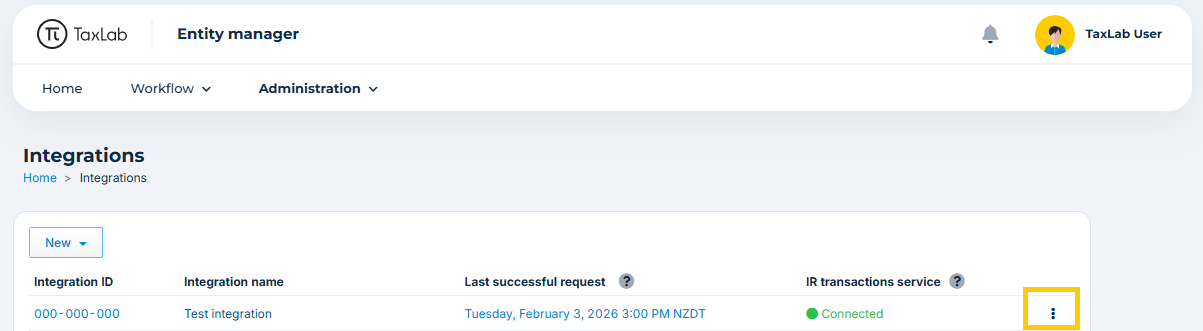
- Use the drop down select the new myIR credential.
- Select Save.
A user with Administrator access to an organisation can edit an IR integration regardless of who created it.
Troubleshooting
Do I need to set up more than one Inland Revenue integration?
For Tax agent integrations: Each client list will require its own IR integration. However if you have access to more than one client list on your Tax agency you will not need to set up another myIR credential.
For Customer integrations: If you access entities in myIR via separate logins then you’ll need to set up a myIR credential for each login. Every entity will need its own IR integration.
What's next?
Now add entities to an organisation.
Related articles
Learn how to reauthenticate an Inland Revenue integration.
Learn more about correspondence tasks.
Was this article helpful?
That’s Great!
Thank you for your feedback
Sorry! We couldn't be helpful
Thank you for your feedback
Feedback sent
We appreciate your effort and will try to fix the article