Overview
When an organisation is created in TaxLab, users do not need to be manually added to it. Any user who creates a TaxLab account using an email address that matches the organisation’s email domain is automatically linked to that organisation. However, being linked to an organisation does not automatically grant access to its entities. Only the user who creates an entity can grant other users access to the entity. When granting access, you can assign the appropriate role and application permissions for that entity.
Workspaces versus organisations
The space that your users work in is called your workspace. An organisation can consist of a single workspace, or could have multiple workspaces. Multiple workspaces are commonly used by accounting firms where all users have the same email domain, so belong to the same organisation, but each office wants to keep their date separate from the others. When workspaces are set up, administrator users become administrators of only their workspace. Workspaces need to be configured by TaxLab, so please contact TaxLab Support to request access to this feature.
Invite users to organisations with multiple workspaces
This action can only be performed by a workspace administrator.
If your organisation has workspaces enabled, or you want to invite users that do not share your organisation’s domain, you’ll need to invite users to your workspace before they create their account.
- From the TaxLab home screen > select Administration > under Management > select Users.
- In the Invite users text box enter the user's email address.
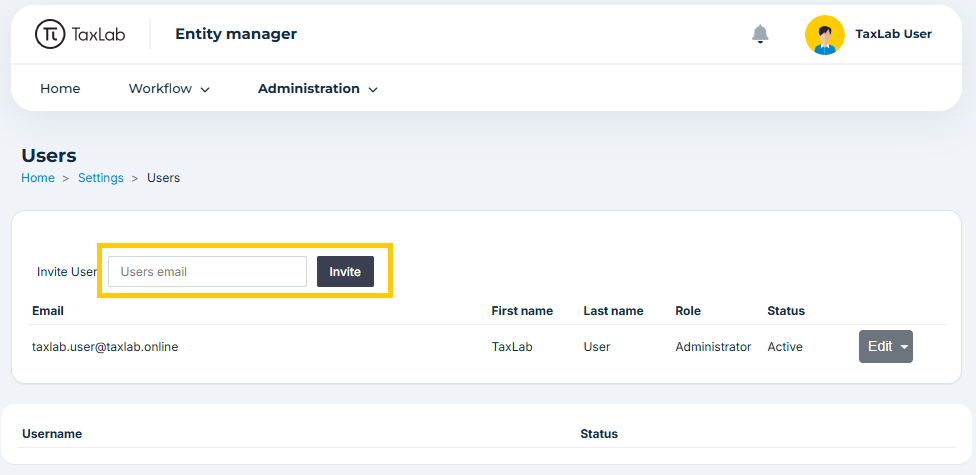
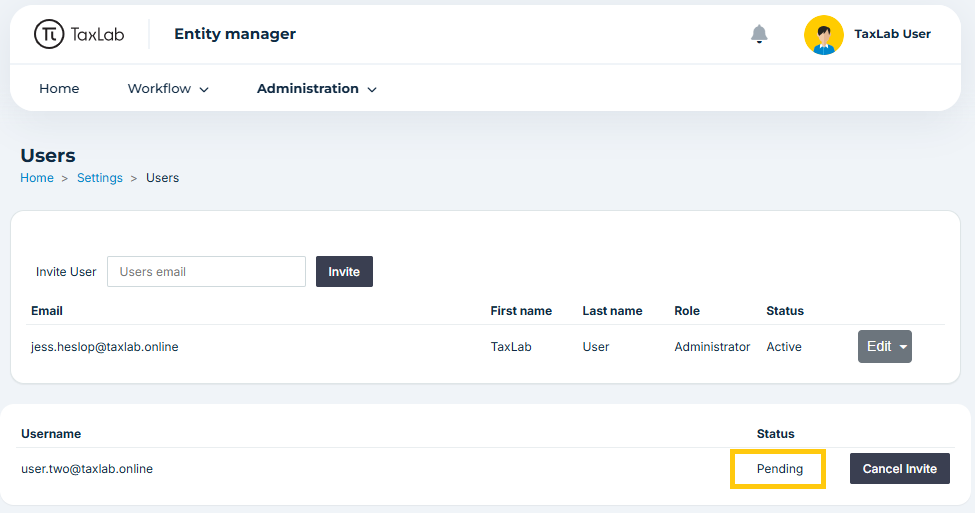
- Select Invite. The user will display with a Pending Status until they create their account. Selecting Cancel Invite before the account is created removes the user's invite.
If a user is added that belongs to another workspace already, the following error message will display:

Assign users to entities
Users can be added to entities either one at a time, or to multiple entities simultaneously. Any existing user with full access to an entity can add a new user.
There are two levels of access within an entity:
Application: this determines which TaxLab modules the user will have access to for that entity.

INC only | By default, this role gives users full access to income tax returns. You can limit this access by selecting the “Read Only + Queries” option from the INC drop-down list. |
FBT only | By default, this role gives users full access to fringe benefit tax returns. You can limit this access by selecting the “Cash pay is hidden” option from the FBT drop-down list. |
Standard | This is the default setting. It gives users full access to both income and fringe benefit tax returns. You have the option to limit access by selecting alternate options from the INC and FBT drop-down lists. |
Within each application: this determines the level of access that the user has within that module for the entity, either no access, read only or full access.

| Access and Activity | No Access | Read Only | Full Access |
|---|---|---|---|
View full list of entities in a workspace | ✔ | ✔ | ✔ |
View users on an entity | ✔ | ✔ | ✔ |
View IRD number | ✔ | ✔ | |
Add other users to entity | ✔ | ||
Edit or delete entity | ✔ | ||
View tax returns | ✔ | ✔ | |
Edit a tax return | ✔ | ||
Commence filing process | ✔ | ||
Reset e-filed tax returns back to 'Draft' | Administrators only | ||
E-file a tax return | ✔ | ||
View filing status of tax returns | ✔ | ✔ | |
View payment tasks | ✔ | ✔ | |
Add entity to tax authority connection | ✔ |
Users can also be assigned a Role within an entity. Roles are used in payment and return tasks, and determine which user the system assigned the task to.
Single entity access
From the TaxLab home screen, either select the row of the desired entity to activate the Add user button, or select the name of the entity, and then the Users tab.

Select Add user
Enter the email address of the new user
Select the Application access and permissions
Select Save
If the user has not yet created an account they will display with a pending account creation badge.
Multiple entity access
From the TaxLab home screen, select the row of one entity to activate the Add user button
While holding the Shift or Ctrl key, select the other entities you want to include (their rows will be highlighted)
Select the Add user button
Enter the email address of the new user
Select the Application access and permissions
Select Save
It is also possible to bulk add users to entities by giving them roles via the entity management feature. However allocating a user a role will automatically grant users standard (full) access to all applications.
Activate user accounts
Once you have allocated user access to entities, it's time for your users to create and activate their accounts. The way this works depends on the access setup you are using, and the email domains of your users.
Single sign-on (SSO) organisations
If your organisation is using SSO, you’ll need to provide new users with your organisation's SSO login link in order to create their account. Our system will ask them to confirm their details, then automatically create a TaxLab account for them.
Other organisations
Notify your users to create their TaxLab accounts. Once these are created, your users will be able to access the entities you added them to.
What’s next?
Once you’ve added users to your TaxLab organisation and entities you can add further information, such as adding groups, contacts and user roles to entities. You can update user access, roles, and permissions at any time. See Manage users for day-to-day user management.
For organisations that are only using the FBT module, begin with FBT essentials.
Related articles
Was this article helpful?
That’s Great!
Thank you for your feedback
Sorry! We couldn't be helpful
Thank you for your feedback
Feedback sent
We appreciate your effort and will try to fix the article