Overview
In TaxLab, benefits provided to employees are organised using pooling categories and benefit categories.
Pooling categories determine how benefits are treated in the FBT calculation.
Benefit categories group similar benefits within a single pooling category. They can be added or changed at any time, so it’s important to review benefit and pooling category settings before filing each return.
Benefit categories and pooling categories
Pooling categories are the categories of benefits defined in the Income Tax Act 2007. The Act allows certain benefits to be pooled or attributed based on annual benefit thresholds. Pooling or attribution decisions are applied consistently across all employees within each pooling category and can influence FBT outcomes across all categories.
Benefit categories provide a more granular view of the types of benefits provided to employees, over and above the pooling categories. All benefits in the same benefit category are treated the same for FBT purposes, while still allowing you to create sub-groups that make sense for your business. TaxLab comes with a default set of benefit categories, each linked to a pooling category. New benefit categories can be created manually or are added automatically during data imports.
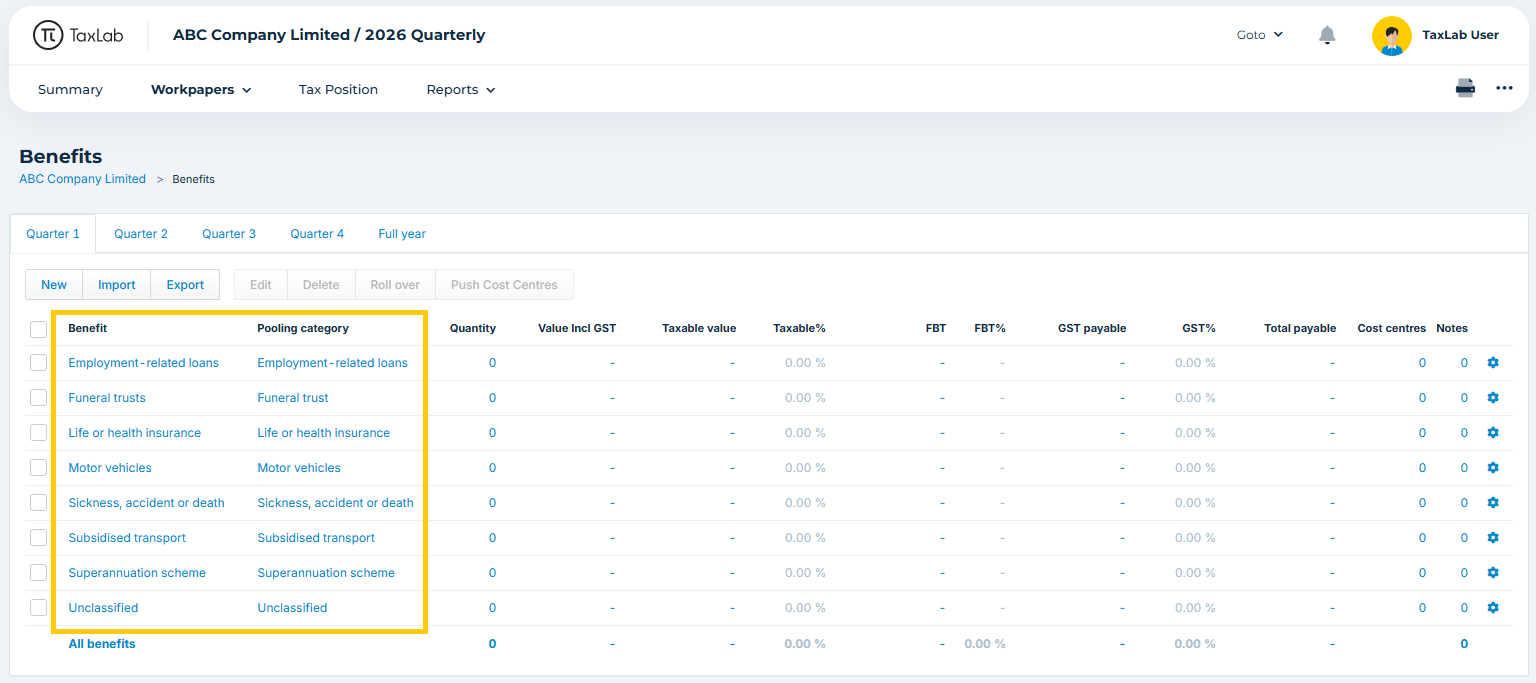
The default benefit categories are mapped to pooling categories as follows:
| Default benefit category | Assigned to pooling category |
| Employment-related loans | Employment-related loans |
| Funeral trusts | Funeral trust |
| Life or health insurance | Life or health insurance |
| Motor vehicles | Motor vehicles |
| Sickness, accident or death | Sickness, accident or death |
| Subsidised transport | Subsidised transport |
| Superannuation scheme | Superannuation scheme |
| Unclassified | Unclassified |
Adding and editing benefit categories
Manually add a benefit category
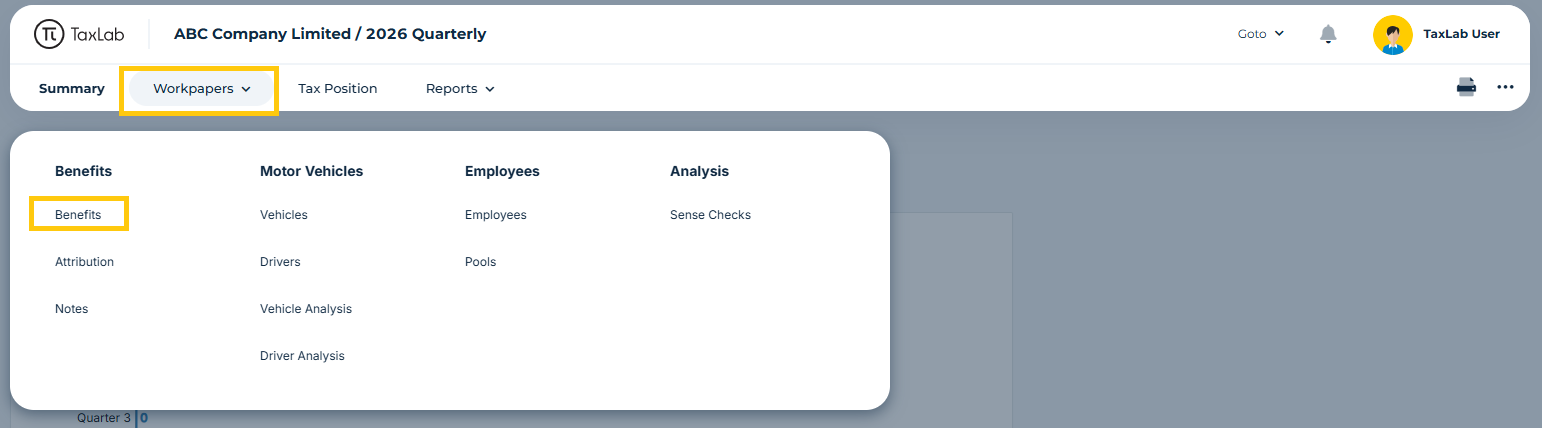
- From the entity's FBT return, in the navigation bar select Workpapers > Benefits.
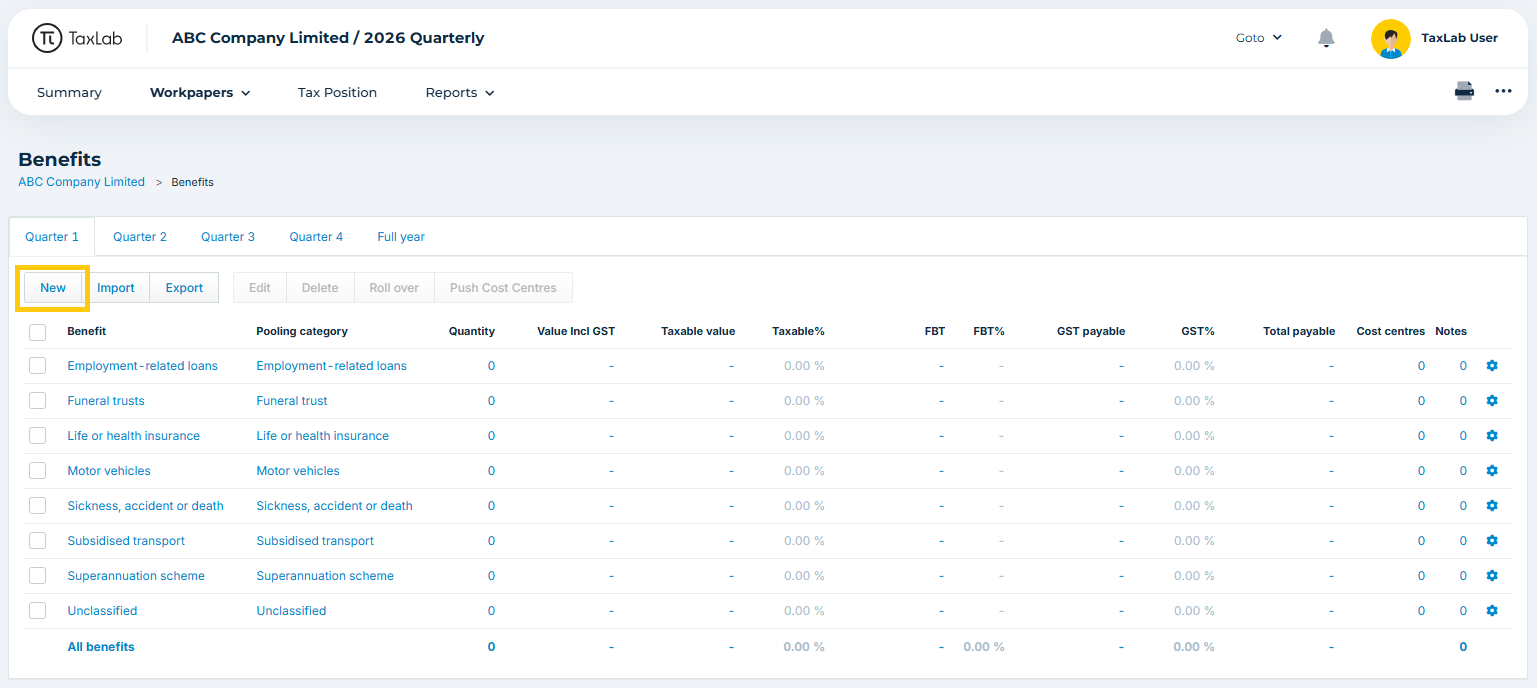
- From the Benefits screen (any quarter), select New.
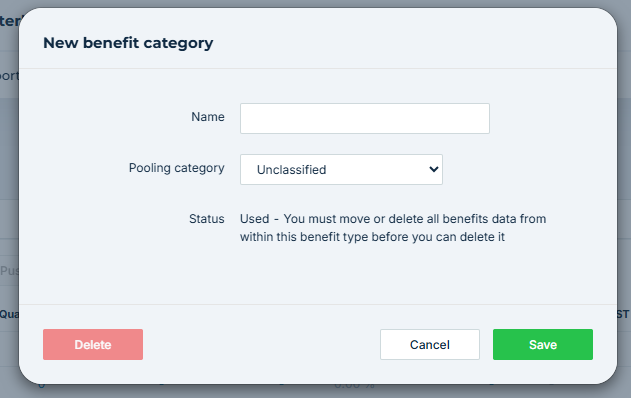
- Enter the name of the new benefit category (e.g. Southern Cross).
- Select the pooling category the benefit belongs to (e.g. Life or health insurance).
- Select Save.
Automatically add a benefit category during import
When benefits are imported and a Description not already on the benefit categories list is used, a new benefit category is automatically created. This enables the quick addition of new categories during import. Imported benefits default to the "Unclassified" pooling category setting, which may not always be correct. Benefit categories and their pooling category assignments should therefore be reviewed each quarter before return filing.
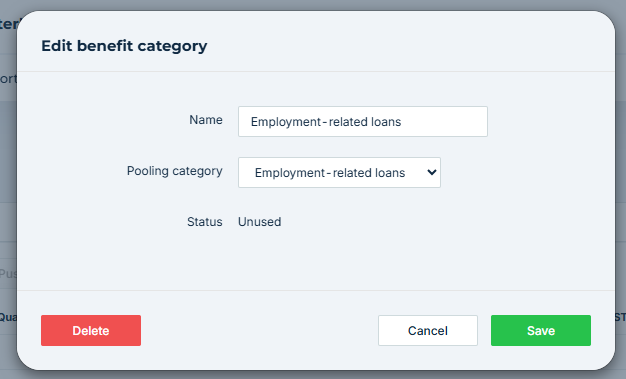
Edit a benefit category
- From the Benefits screen, select the Settings cog next to the benefit category.
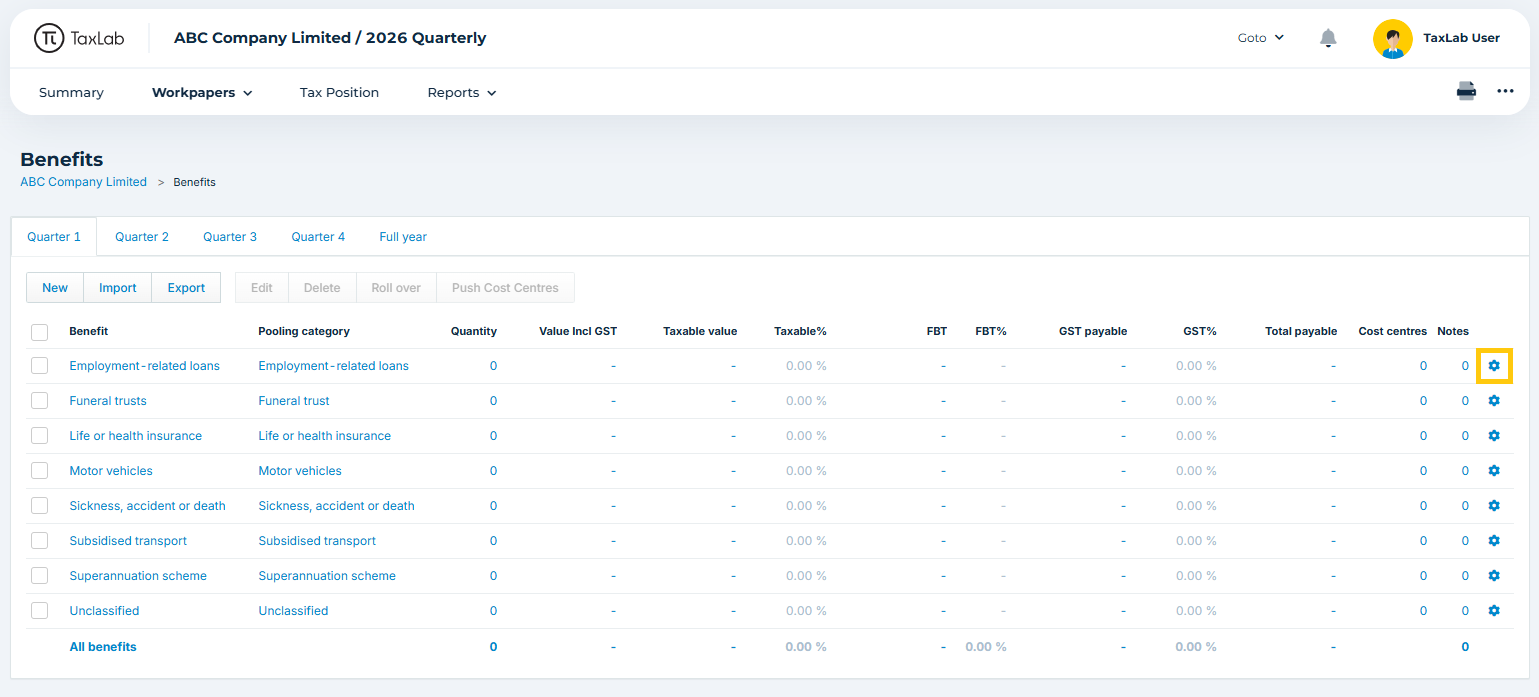
- Edit the name and/or pooling category, as required.
- Select Save.
Deleting benefit categories
A benefit category can only be deleted if there are no benefits associated with it in any locked period across any tax year. This helps prevent accidental deletion of data from prior periods.
- From the Benefits page, select the Settings cog next to the benefit category.
- Select Delete.

Troubleshooting
Cannot edit benefit category
This occurs when a benefit category is appearing in a locked quarter. You will need to unlock the relevant quarters in the tax year before editing.
- From the Navigation bar, select the more options menu > Settings.
- In the Return Lock column use the toggles to unlock any quarters.
Cannot delete benefit category
A benefit category cannot be deleted if there are no benefits associated with it in any locked period across any tax year.
Any benefits included in the category must be reassigned by bulk edit, or deleted, before the benefit category can be deleted.
What's next?
Related articles
Was this article helpful?
That’s Great!
Thank you for your feedback
Sorry! We couldn't be helpful
Thank you for your feedback
Feedback sent
We appreciate your effort and will try to fix the article